Tuesday, April 29, 2014

The Bathroom Meets its Demise: The Demo

Well… I mentioned last week that we are officially insane. The reason? We decided to tear out our entire bathroom. Yes- a husband who's transitioning jobs and a hormonal wife that is 7 months pregnant. We couldn't have chosen better timing. We keep asking ourselves why didn't we do this sooner, but if we've learned anything from these home renovations it's that no schedule of ours makes any sense. We really just work best with deadlines looming.... and by deadline I mean the baby's arrival. 
 
Now, I'm not technically doing any of the manual labor- other than offering bottles of water to Nathan and doing the occasional Lowes run- but I'm there in the midst of the madness and waiting patiently during each step.  Nathan has been working around the clock and has had some major help from his dad who stayed with us the past two weeks and of course we've had the assistance of our handy friends who have really helped move the process along.
 
Apparently no blog post of mine is complete without an embarrassing before picture of what I've lived in the last (almost) 2 years. Here's what the glorious college bathroom looked like before demo. If you remember- I had a brief moment when I thought we could live with it with just a few updates, but then my sanity came back and I officially refused to bring a baby into this world and bring he or she home to this bathroom.
 
Check it out...


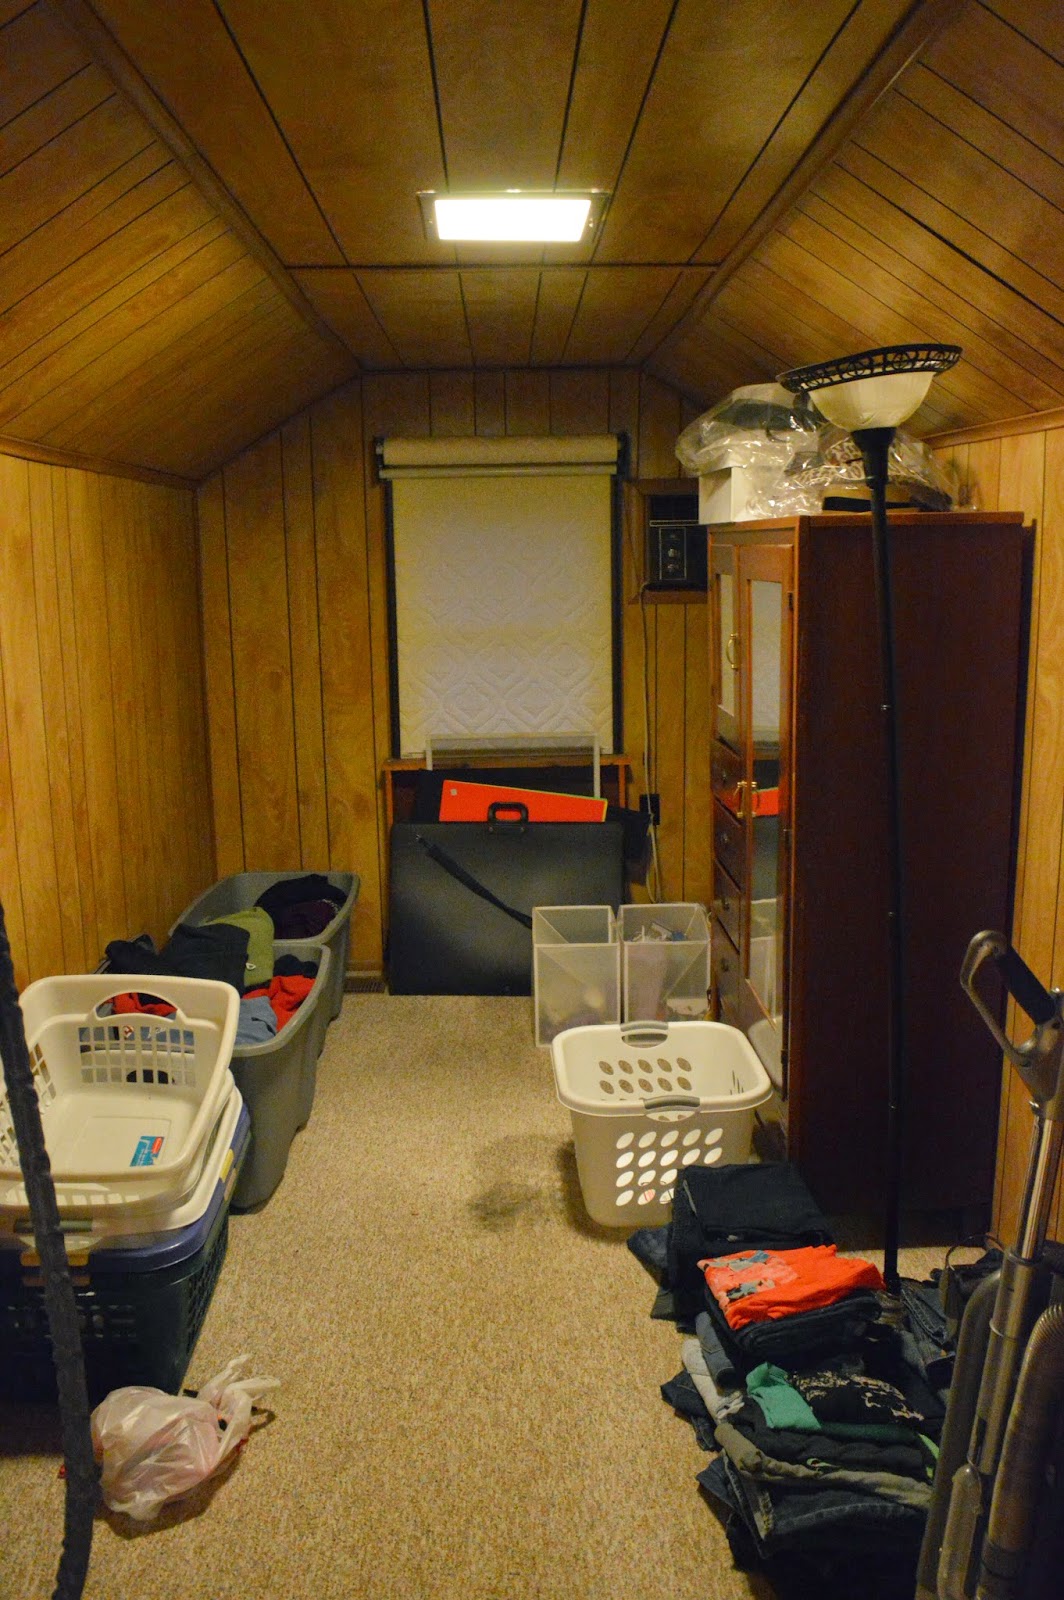
A claw foot tub used to sit where the laundry hamper now sits...
 
 
Our lone shower stall...


Yep... the hamper hid the gash in the wall... where the claw foot tub used to be.


I'm no longer phased by these before pictures...


In all seriousness- the bath had to be done at some point. It didn't even have a tub- just a lone shower stall. Tubs are completely necessary for babies and kids… and resell value which is always in the back of our minds. We have a shower stall, toilet, and sink in our basement that we have been using, but it's all out in the open and not technically what you would call a 2nd bath... The openness has caused us to start affectionately calling it the "prison bath" (Thanks Sandy!) It works though so I'm not complaining!
 
I don't have pictures of the bathroom from a few years ago, but for decades it had a claw foot tub. People think we may have been insane to get rid of it, but it was so old and cracked that it wasn't worth fixing. Past homeowners had tried to repair it for years, but it was never really fixed. I also don't think I would have gotten in it if you paid me. I sound like a bathroom snob but it was just filthy. Out it went (leaving a giant gash in the wall) but I certainly haven't looked back.
 
We started demo 2 weeks ago... Thankfully we rented a dumpster which barely fit in our driveway as you can see below.
 
 
The product of a full day's work. Good riddance!

 
Below is a before and after of the demo of the vanity wall. It was crazy to see the different color paints that have been used in the past. The yellow/green screams 70s to me! Very interesting to find where the old medicine cabinet used to be.


 Exterior wall (Fan is in the window which we ended up boarding up).
 
 
After they pulled up the tile they found some ancient linoleum. I couldn't even tell how old it was but all I know was that it was nasty!
 
 
Big guy tacking the wall after tearing out the shower stall.


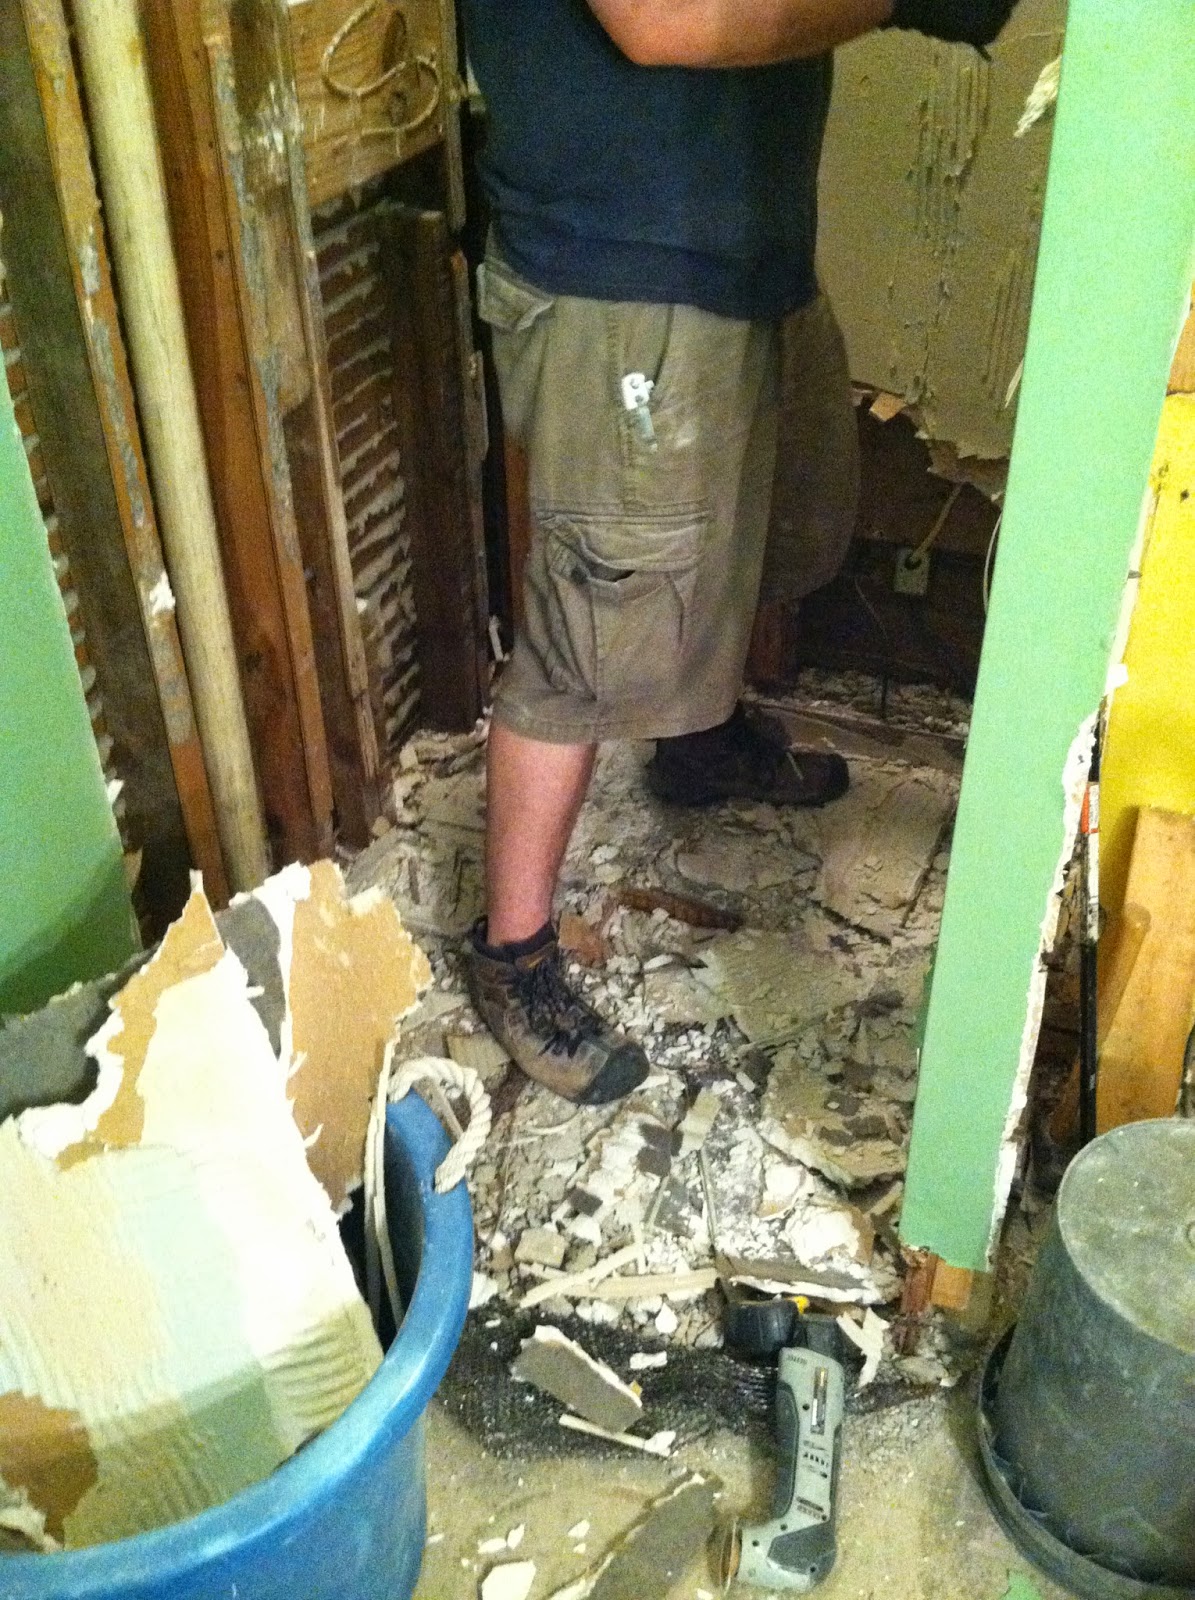
He will HATE this picture :)

 
Shower wall down to the studs!


And finally a welcome sight- a hole for our new toilet!
 
 
And that's all I have from our demo! Next post I'll talk about our new floor plan for the bathroom and the progress we have made. Thankfully it's going pretty quickly and I think I'm only a week or so away from no longer having to use the prison bath. In the meantime, I'll stare at the photo below and be thankful that I'll never have to set eyes on this bathroom again... it really was worse than it looks- I swear!


-Tricia 


Tuesday, April 22, 2014

Nobody Puts Baby in a Closet.... Except Us


I would like to introduce you to our nursery.... which has also been known as the "Weldy Catch All Closet" for the last year and a half....  TA DA!
 
Wood paneling and all, it is a spectacular sight to see.
 
 
Did I mention that in college this room was known as the panic room? Don't ask. 
 
I honestly didn't even think about using this "closet" for a future nursery when I moved in which is really crazy now that I look back. I always intended to turn the first floor bedroom into a nursery and make our back addition into a guest room/den combo. But then my smart husband mentioned that babies don't really need a ton of space, this room would be on the SAME floor as ours, and a guest room is really a necessity especially if we have grandparents and family visiting once the babe is here.
 
So, it didn't take much to convince me that this roughly 6.5' x 12' room would be perfect for our babe! It will never know that its new room was once my closet filled with stacks of jeans, Derby hats, and bins of winter clothes. We now have a new motto of "Humble Beginnings are Good Beginnings".... and gosh darnit our kid will like it!
 
Once we got some new dressers for our master bedroom (I will post about those soon I swear!), I finally had the chance to clear out the room... back in March (yes- it has taken me this long to do a post!) April has proven to be a very busy month which has included a full bathroom tear out. So, if you didn't think we were crazy before, I think you can now officially call us insane.
 
All clear!


So... we looked into replacing carpet but the quote was kind of insane since it would include replacing the entire 2nd floor and stairs. The carpet dude told us that our carpet actually wasn't that bad. As you can see here, giving the walls a paint job actually makes the floor look a whole lot better. In the meantime, we're getting it cleaned and putting down an area rug in the nursery just in case the stains can't come up with professional cleaning. COIT says they can do, so we'll see if they stay true to their word! 


In a 100 year old house, you have to be prepared for "surprises". There was a tiny shelf that was installed a long time ago under the window which we thought would be an easy removal...
 
 
It wasn't too bad to tear out, but we discovered some retro shag carpet that apparently was never removed when this "newer" carpet was installed. I seriously almost gagged! Good news is we plan to install a built in bench under the window so baby (and the next owners) will never know.
 
But seriously our baby is going into a closet with remnants of lime green shag carpet... Remember what I said about humble beginnings? Oh well- I kind of love it.


We ended up just putting a board over the area on the wall we tore out- we figured the wall is going to be all the same color and covered by a bench so it's good enough!
 
Next up is our least favorite but VERY important task of caulking. ESPECIALLY in a room with wood paneling and trim- caulking is a MUST. Nathan hit every corner and edge of the ceiling and walls. It really does help make the room look more seamless.


Once the caulking was complete, it was priming time! We found out that priming wood paneling requires a few coats- which I was happy to do until my hand looked like "the claw". Apparently carpel tunnel syndrome is a real symptom of pregnancy. Who knew?


Once primed, it was on to paint. You may think I'm being boring but I decided to do white walls since the room is so tiny (Don't fear- I do plan to add pops of color with accessories and fabric). I also think painting the wood paneling white kind of gives it that board and batten look which I LOVE. We considered removing the wood paneling and replacing it with drywall for about 5 seconds- but it just wasn't worth it to us. I'm actually really happy we kept it in place because I think it looks really charming in a nursery.
 
Now not EVERYTHING is white. I wanted to pull in some color so I opted to paint the slanted ceiling for some interest. So, Nathan and I went on our daily Lowes run (not kidding) to get some color samples....  
 
Nathan thought they all looked the same but they are CLEARLY so different ;)
 
 
So yes we are going with mint on the ceiling. We aren't finding out Baby W's gender until he or she is here (much to my mother's dismay), so I've gotta keep it gender neutral (and I'm trying to avoid your typical greens and yellows).
 
We went with Valspar "Pillow Mint". Unfortunately the prior picture and ALL of the pictures to follow don't really show the color accurately. It's actually brighter and mintier in real life.
 
 
As you can see below, we waited to caulk the ceiling and it shows. The After pictures way below show the end result.
 
 
Here is where we were as of a few weeks ago.... I have since painted the closet doors which I'll hopefully post about soon.


We decided to paint the interior nursery door the same color as our closet doors. Luckily, all the colors are on the same palette so it works.
 
 
Love me some Before and Afters!


Below is what caulking can do for you...


Kept the old light fixture and reinstalled it- just gave the frame a quick spray paint and replaced the glass with a frosted piece. 

 
There you have it. Some minty freshness for ya. Nursery update as of today- Crib is in, Comfy glider is in, MOST fabrics are picked out, and we are picking up the changing table/dresser this weekend! I still have tons to do but end is in sight.
 
Next post will probably be to highlight our bathroom tear out and start of that renovation. We are insane. We really are.
 
God be with us....
 
-Tricia "Humble Beginnings" Weldy